
Running the Robot#
Once we have our workspace setup and dependencies installed we are ready to make the robot do something!
Warning
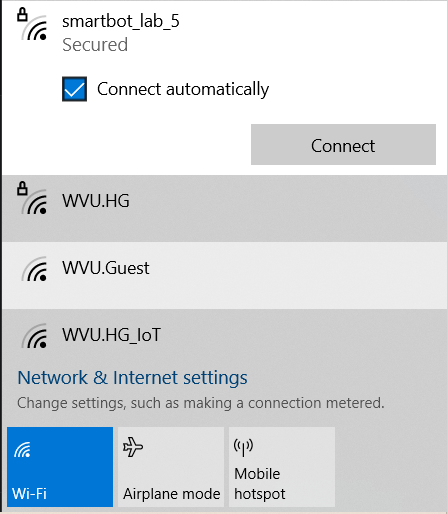
Don’t forget to switch to the smartbot_lab_5 wifi network before starting/connecting to the smartbots!
Start hardware interface on the robot#
Before the robot will respond to commands the hardware interface code on the robot must be running. Fortunately this has been greatly simplified. We can start the hardware interface with two methods: A VSCode task or the shell.
Start hardware interface with VSCode task#
If the “Fast Tasks” extension was installed then several buttons will be available in the “Explorer” pane which will automate the process of starting the robot.
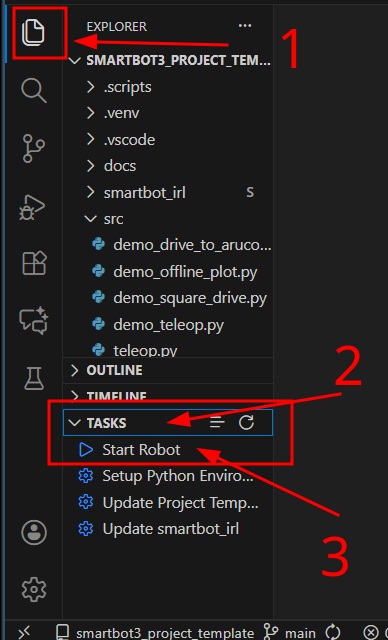
TODO Video
Start hardware interface with shell#
Rather than using the VSCode task we can manually invoke the shell/powershell scripts that connect to the robot.
For linux:
bash .scripts/start_robot.bash 192.168.33.<your_robot_num> prod
For windows:
.scripts/start_robot_windows 192.168.33.<your_robot_num> prod
TODO Video
Stop hardware interface on the robot#
Before the robot will respond to commands the hardware interface code on the robot must be running. Fortunately this has been greatly simplified. We can start the hardware interface with two methods: A VSCode task or the shell.
Stop hardware interface with VSCode task#
Same as starting but now it’s stopping.
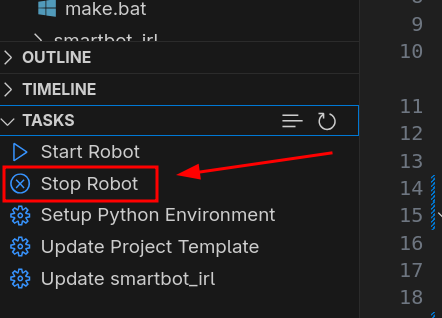
TODO Video
Stop hardware interface with shell#
For linux:
bash .scripts/stop_robot.bash 192.168.33.<your_robot_num> prod
For windows:
.scripts/stop_robot_windows 192.168.33.<your_robot_num> prod
TODO Video