Setup Python Virtual Environment (venv)#
Before we can can use the smartbot_irl package to send and receive data from
the SmartBot we must make it importable for our python code.
We will use a python virtual environment in our project so that we can more easily manage python dependencies. There are two options for creating and manage venvs: Shell commands and VSCodes built in tools. Both are shown here.
Note
Windows makes using python and venvs more cumbersome. Instructions found online will be primarily aimed at Linux and may not work for windows.
Linux Virtual Environment#
Option 1: Setting up a venv using VSCode Tasks#
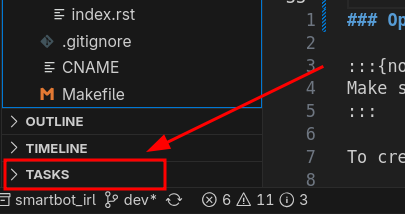
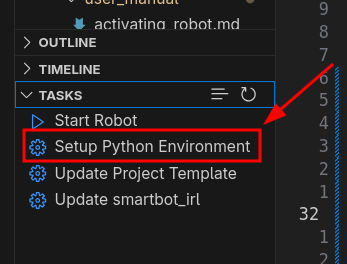
If the “fast-tasks” extension is installed then a small section will appear in the bottom “Explorer” pane. The buttons in this section will automate the process of creating the venv and installing packages.
Option 2: Setting up a venv using the shell#
Note
Make sure to run the following commands from inside the top level of the smartbot3_project_template you cloned!
To create a python3.12 venv in a directory named .venv use the command:
python3.12 -m venv .venv
Then install the smartbot_irl package and all dependencies using:
source .venv/bin/activate
pip install -e smartbot_irl
TODO: Add video.
Windows Virtual Environment#
Option 1: Setting up a venv using VSCode Tasks#
If the “fast-tasks” extension is installed then a small section will appear in the bottom “Explorer” pane. The buttons in this section will automate the process of creating the venv and installing packages.
Option 2: Setting up a venv using the shell#
Note
Make sure to run the following commands from inside the top level of the smartbot3_project_template you cloned!
To create a python3.12 venv in a directory named .venv use the command:
python3.12 -m venv .venv
Then install the smartbot_irl package and all dependencies using:
.venv/Scripts/pip.exe install -e smartbot_irl